• Home
  • About
  • Shop
Menu

spent flora

Street Address
Orangevale, California
Phone Number
Hand made silk clothing for magical people

Your Custom Text Here

spent flora

  • Home
  • About
  • Shop

Lola with cowl

January 22, 2016 Karin

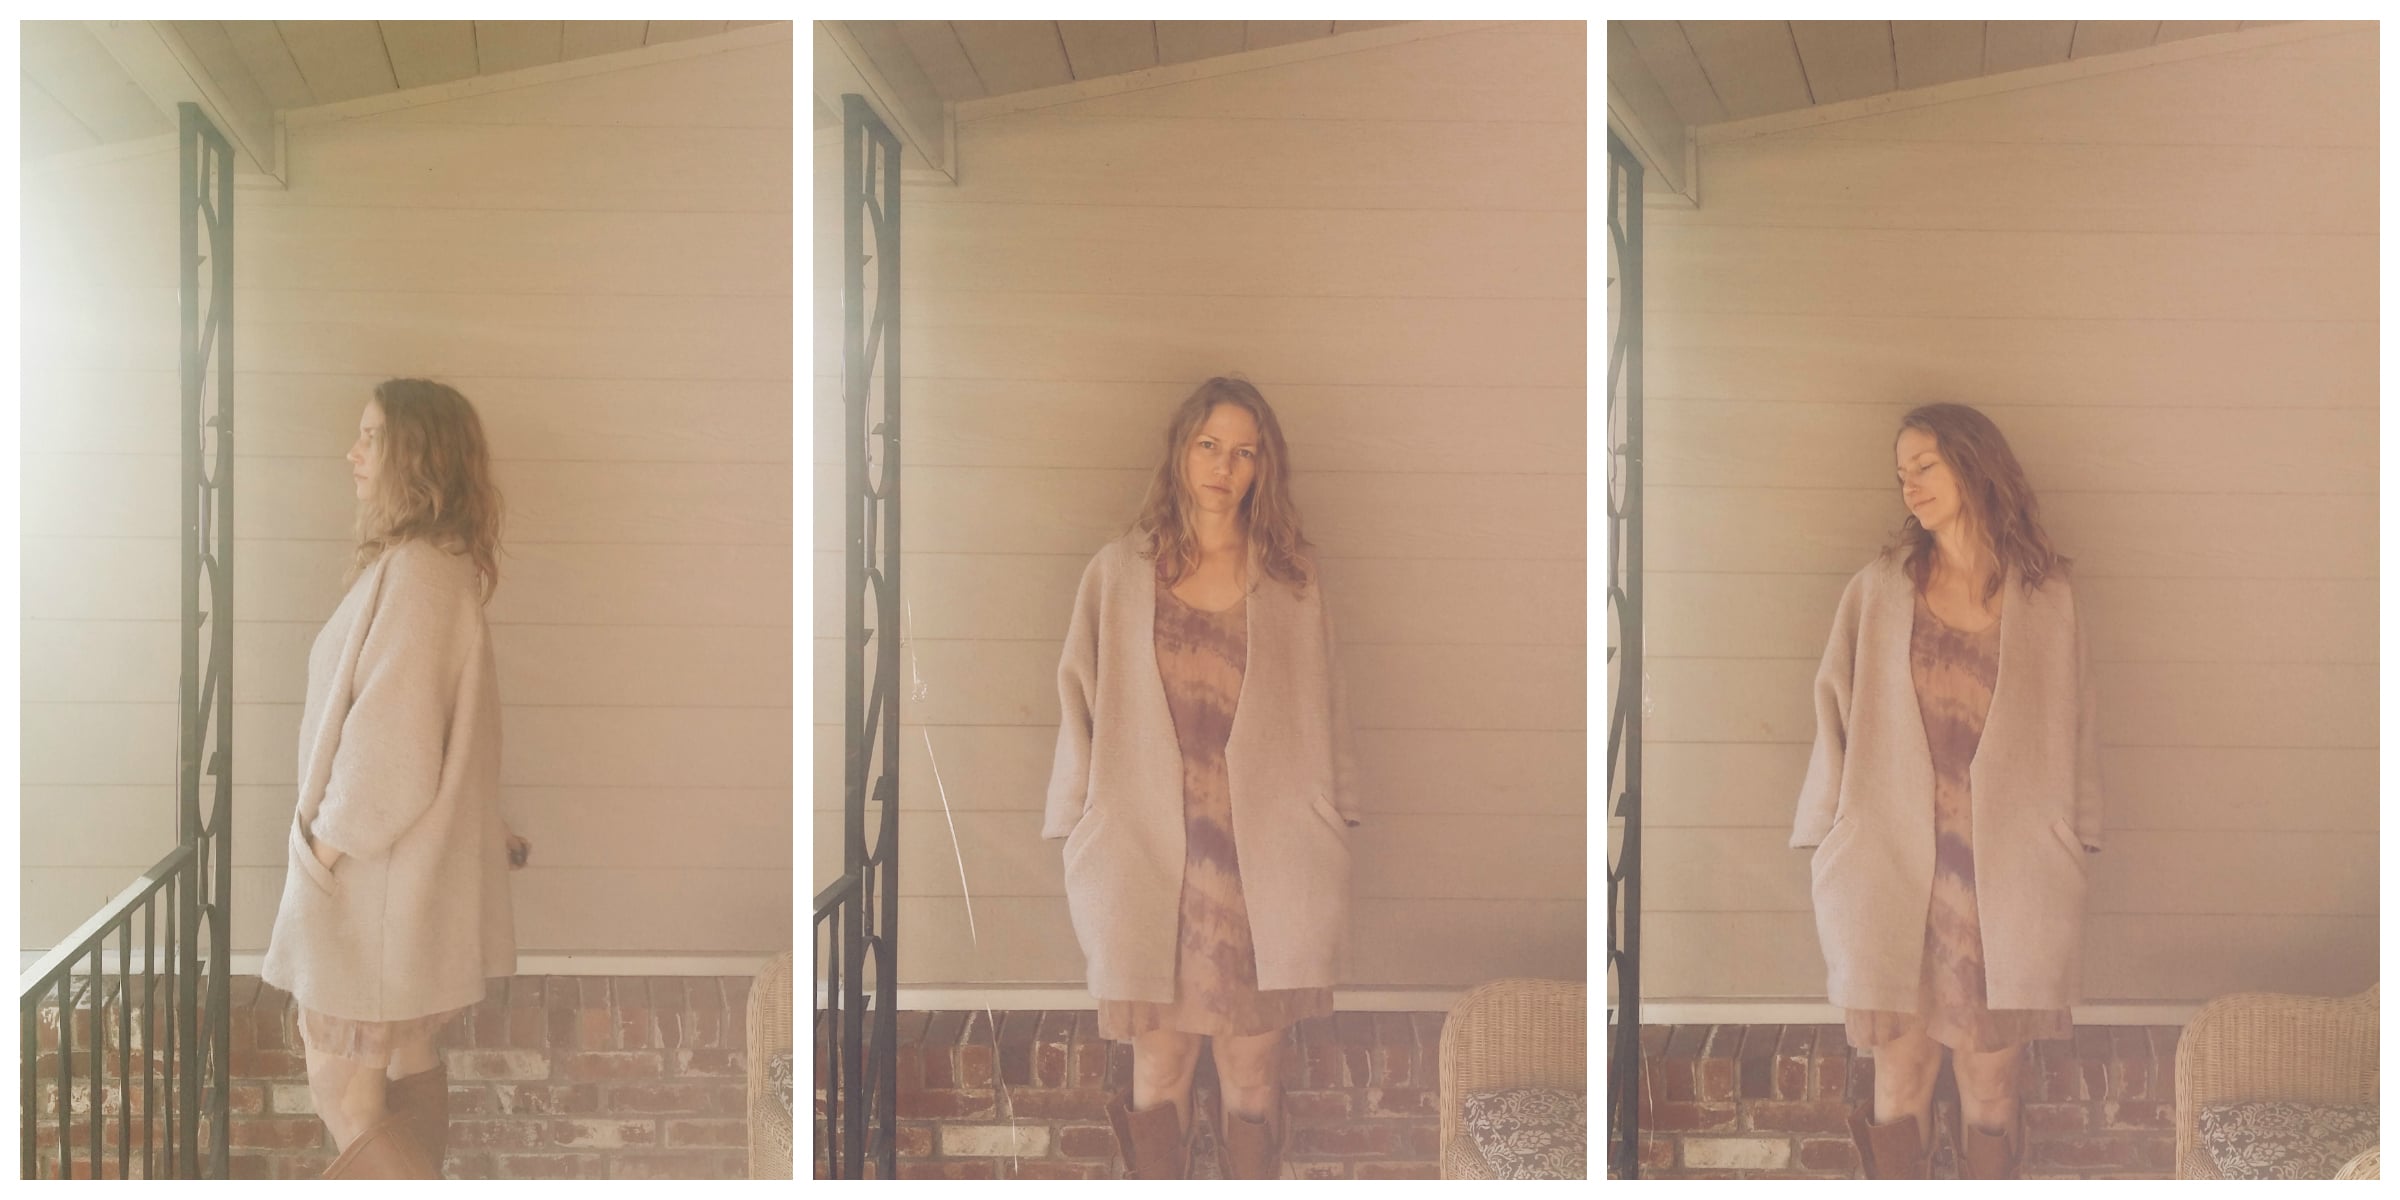
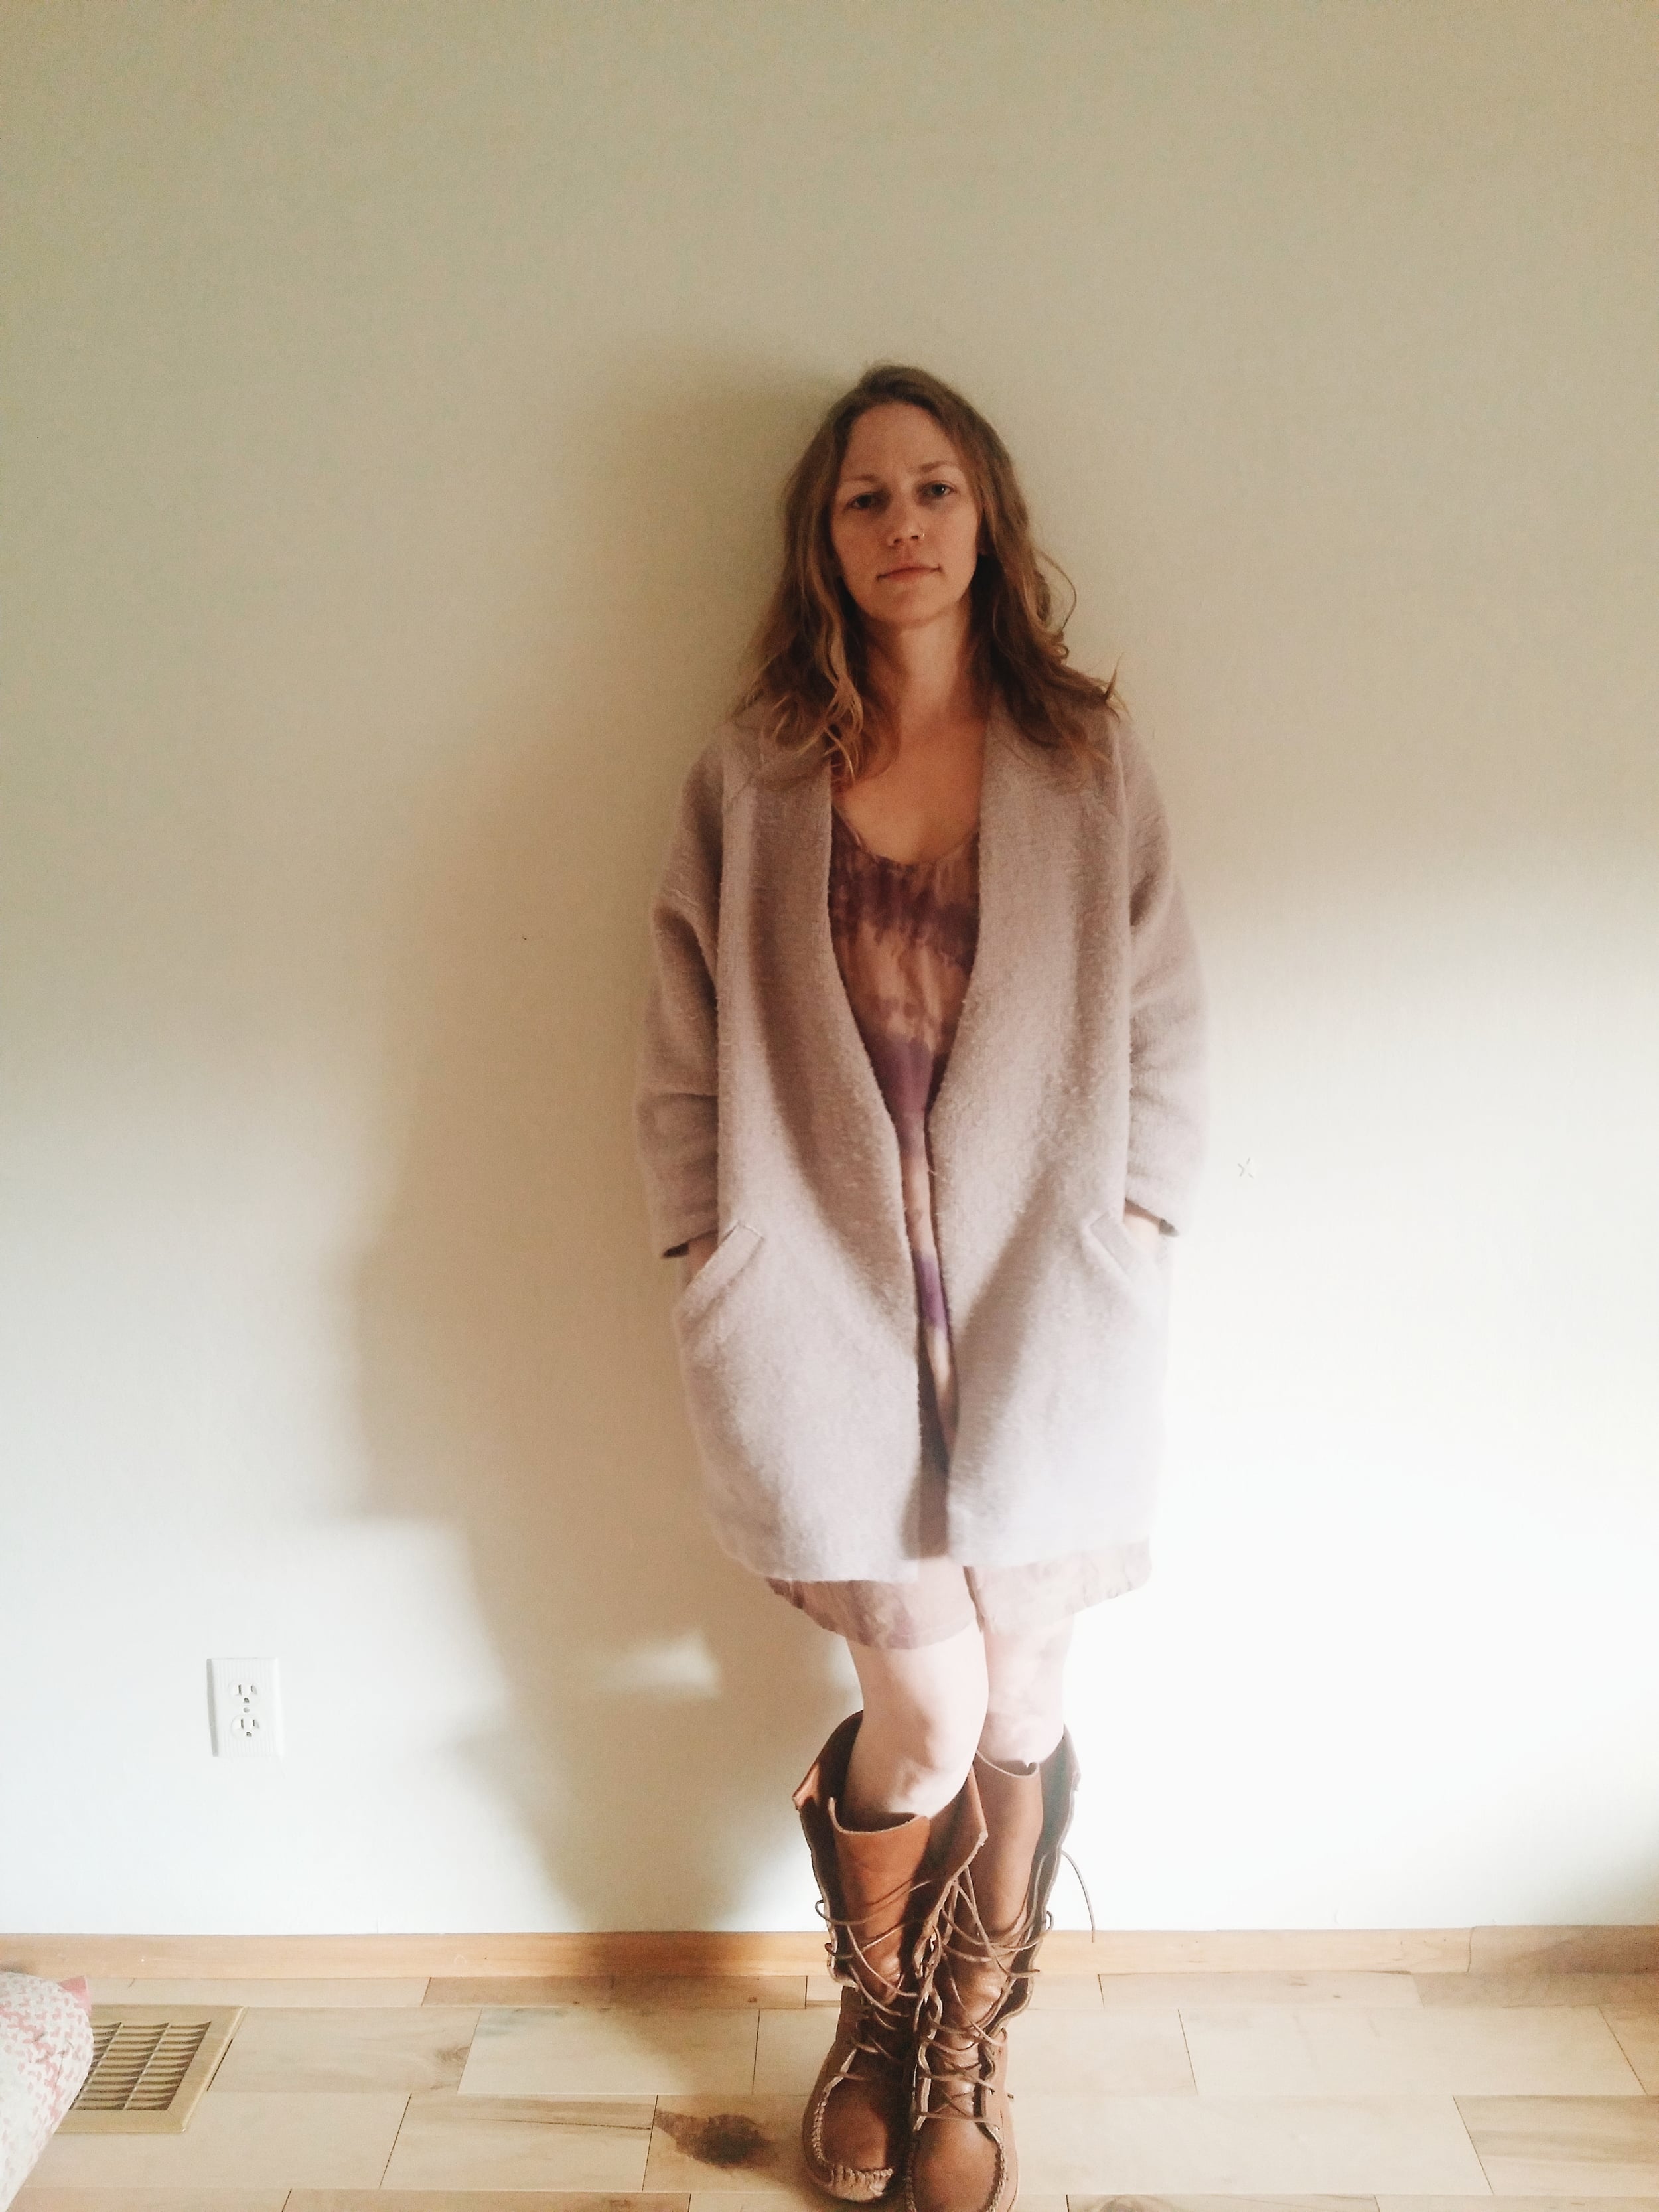
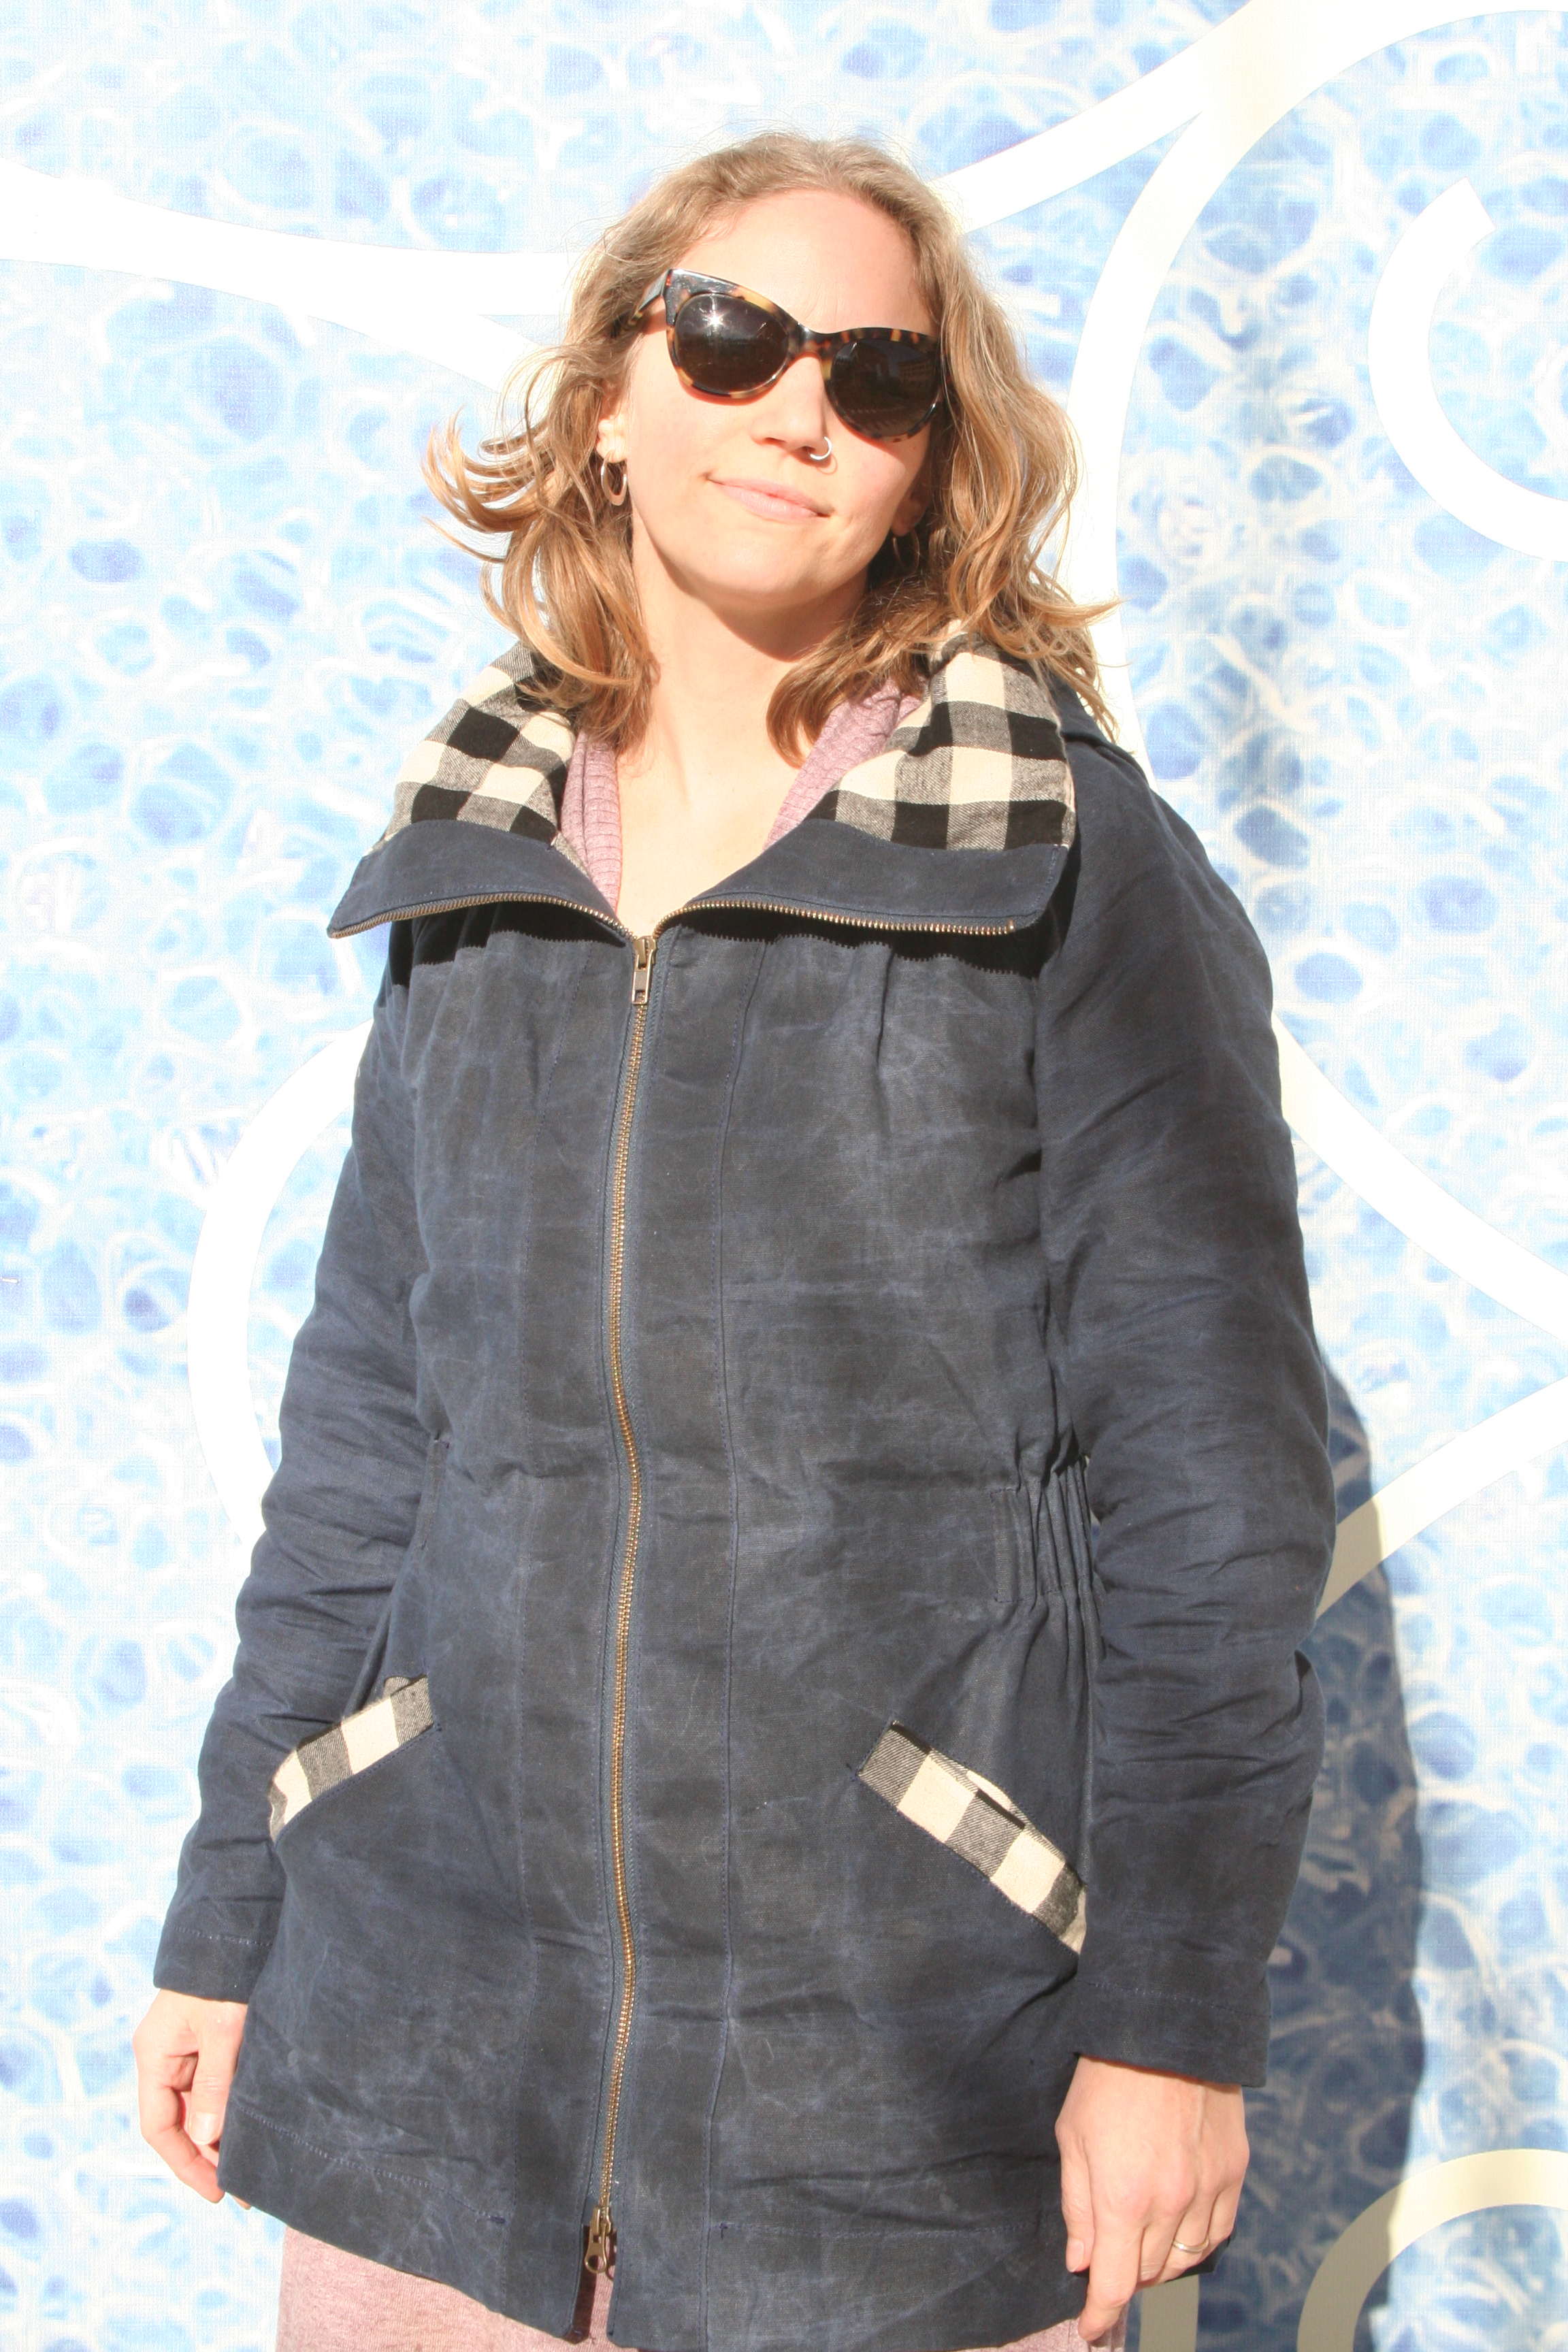
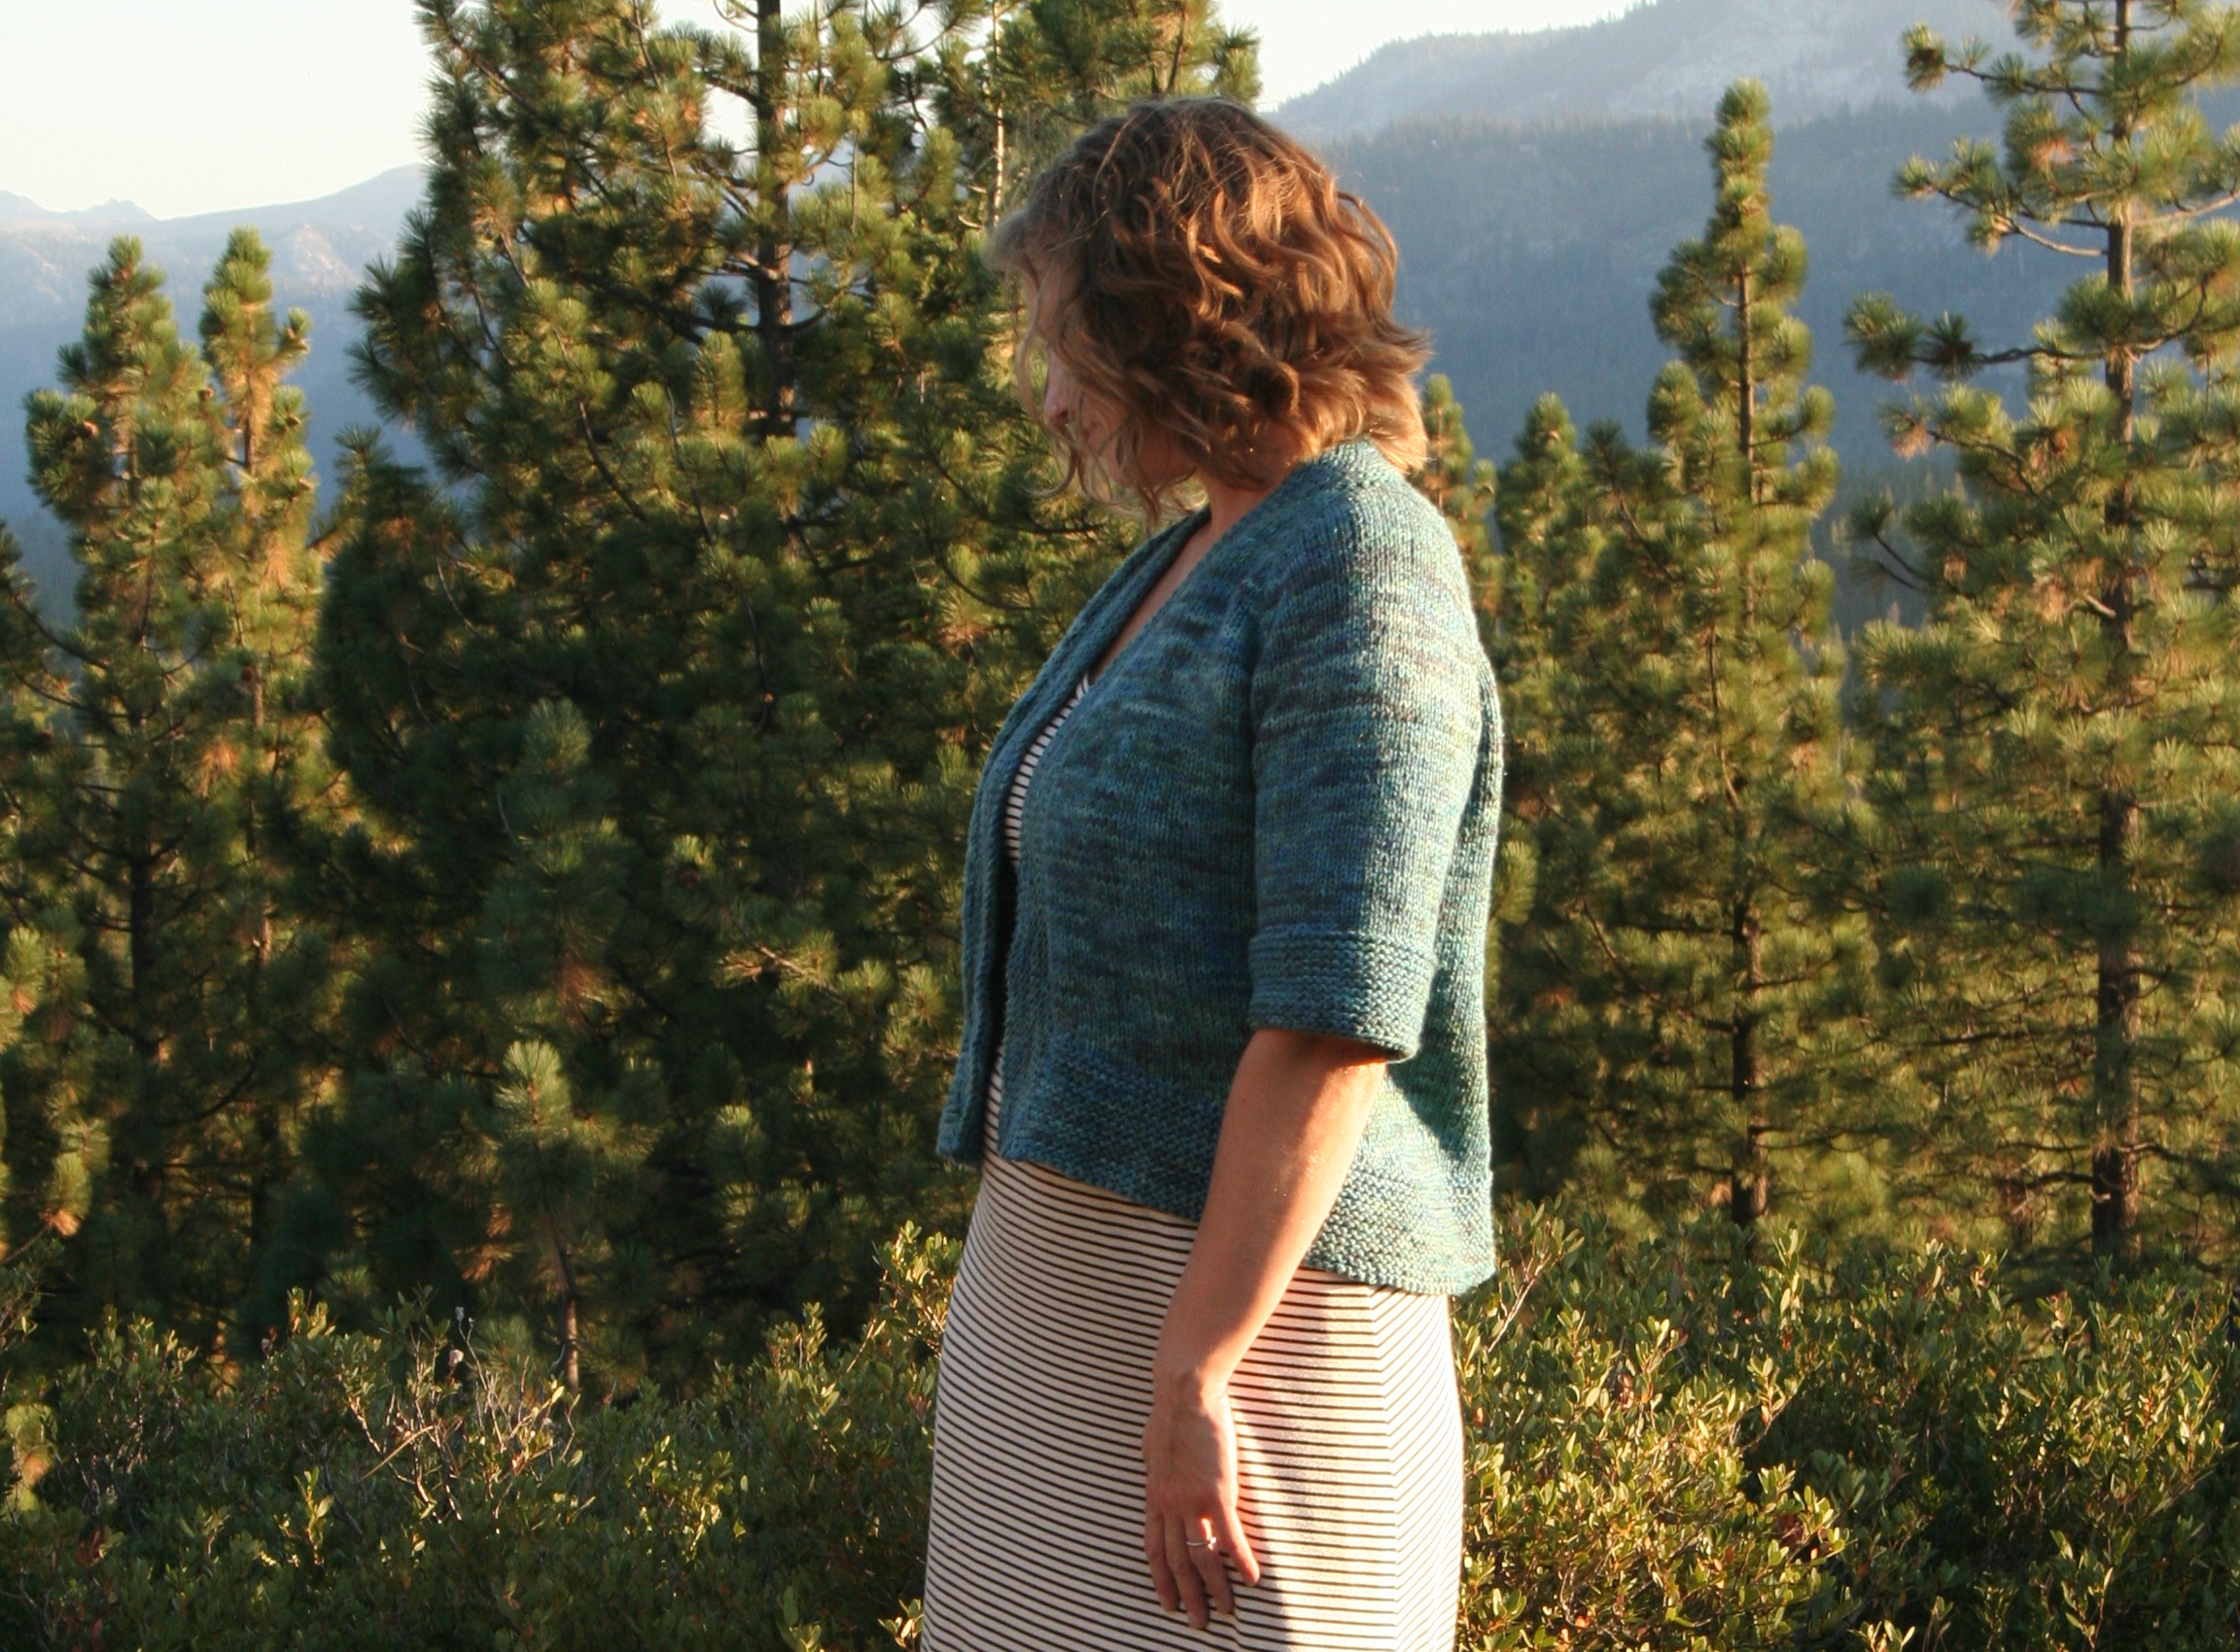
Hello friends!  This little layering dress is the Lola pattern from Victory Patterns.  It's a sweatshirt dress.  Just let that sink in.  That's right, genius, my friends!  I made this pattern once before out of a grey double knit wool.  I wear that version very regularly and really like it.  It's the kind of thing that's warm and comfortable, but also has a polished and put-together vibe.  So I wanted to make another one and thought this bouncy french terry, also from my Pendleton outting would be just the thing.  You can tell I'm heading back to Portland next month and trying to clear out my fabrics from last time so I'll feel like it's appropriate for me to purchase more.

Isn't it so interesting how the same pattern made out of different fabrics can behave so differently?  You can see there is a goodly bit of blousing in the back on this version, and that's after I already took out a bunch at both the back waist and both princess seams.  But my wool version is from a very stable knit and this one is nice and bouncy and sproingy.  I can also see the princess bust shaping being pulled down on this one by the weight of the dress, which does not occur on my first one.  I did lower the bust shaping because I have a long torso, but it fits just right in the wool.

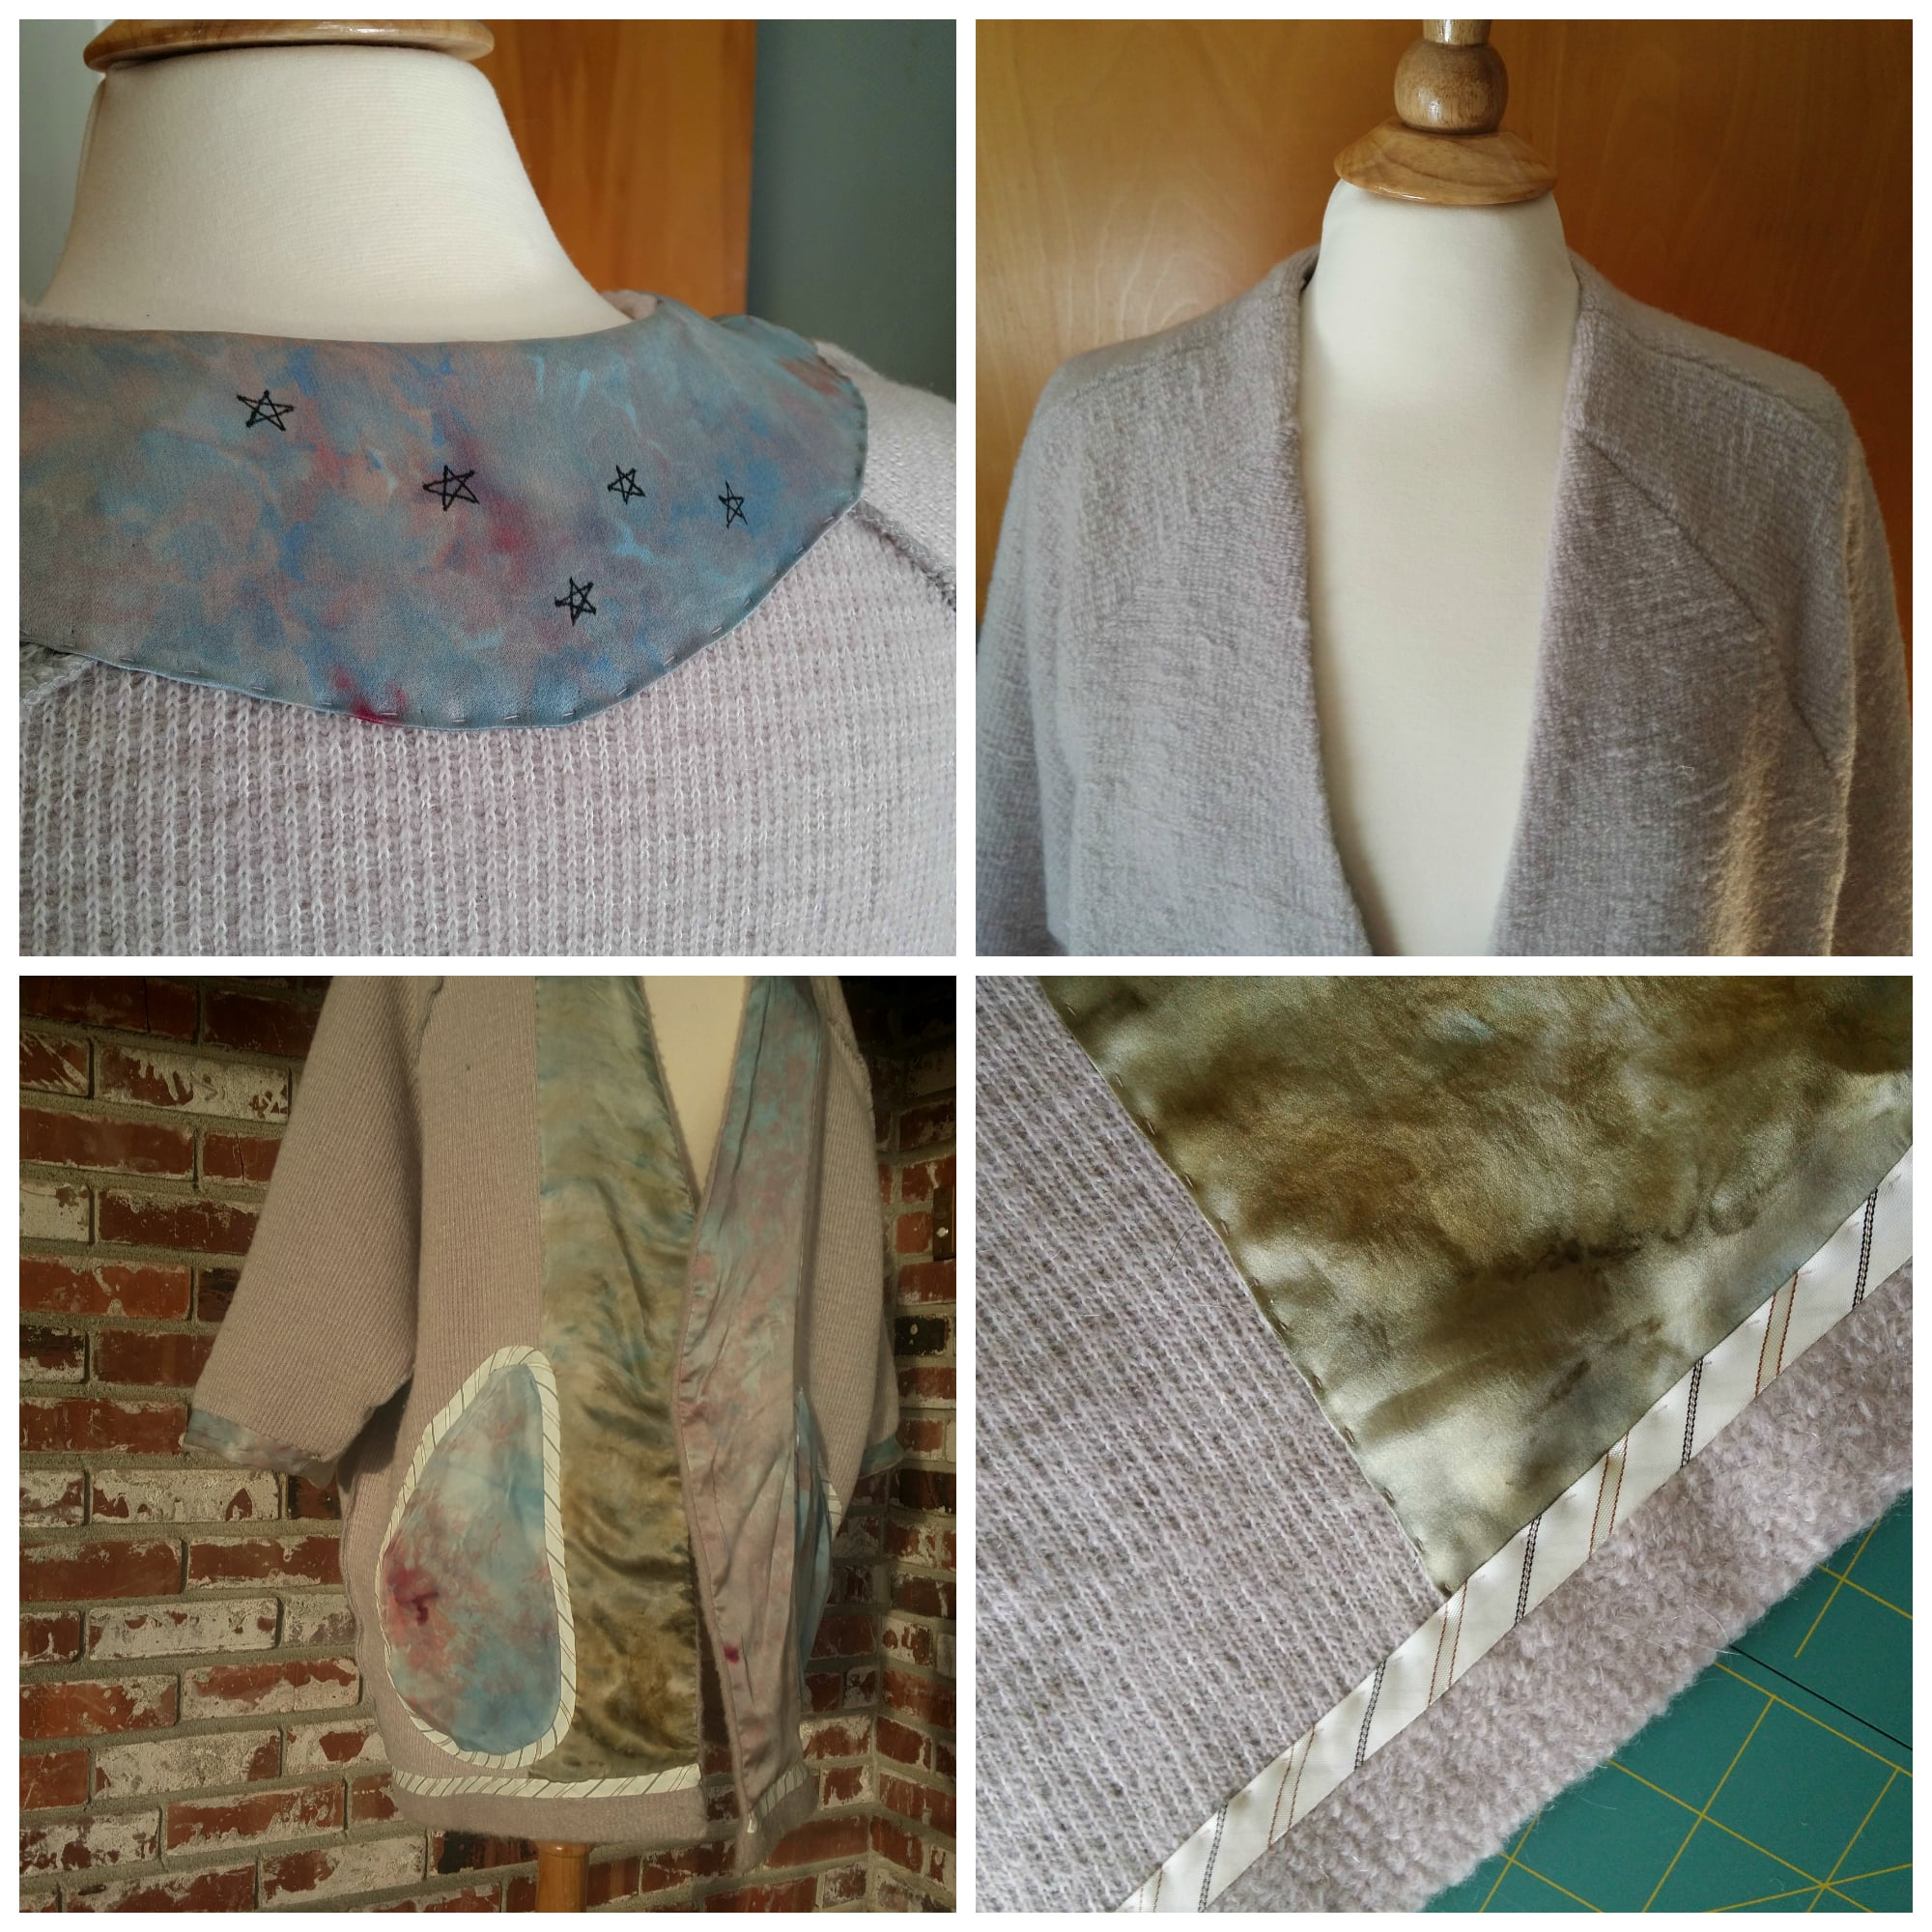
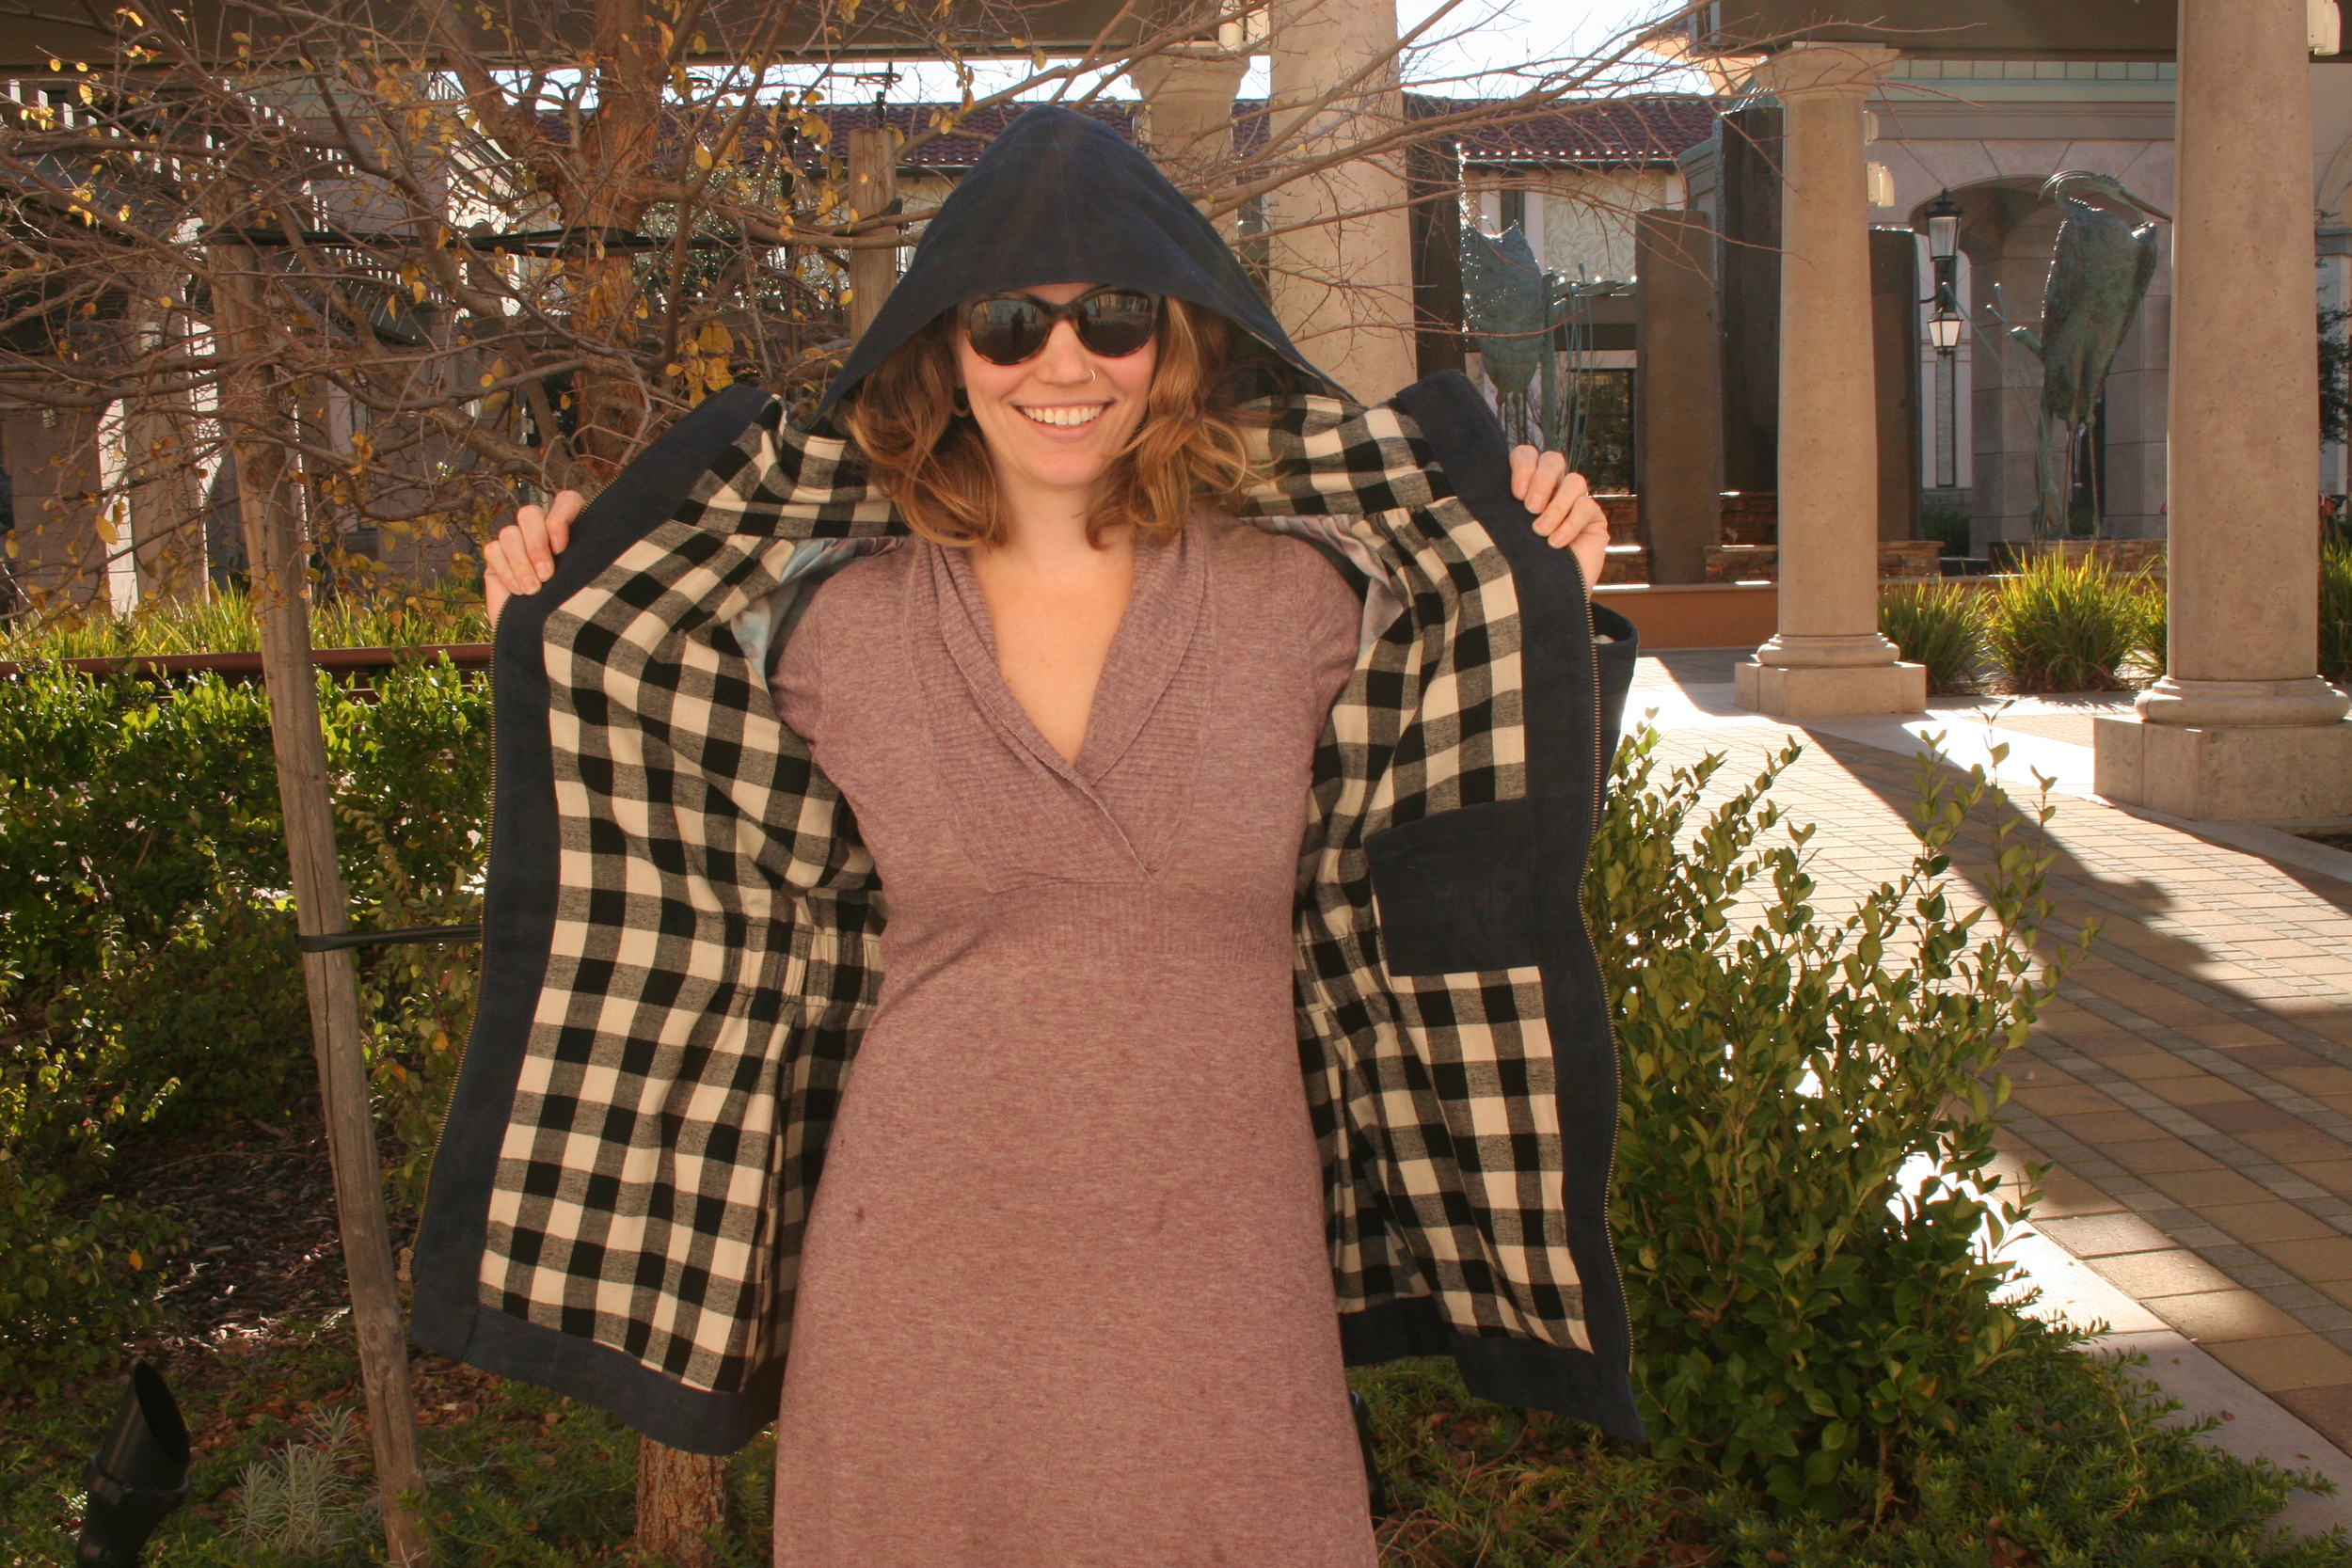
I suppose it's time to address the elephant in the room: pockets.  I skipped the enormous glorious pockets on this pattern in exchange for an enormous cowl.  And believe me, I thought about it a bunch before I did it.  But I really wanted the cowl and I felt like it was such a great opportunity to use the reverse loopy side of the french terry.  I modeled the cowl on one from a Gaia Conceptions sweatshirt I have that has an epic cowl.  It's basically a large tube with the circumference matching the neckline at the bottom and gently funneling out like a horn about 20 or so inches later.  Easier than sewing a band at the neckline.  I just serged the edges of the cowl and the hem for a casual finish.

I really like this pattern, such a nice winter basic.  Stay warm friends!

3 Comments

Freemantle Coatigan

January 8, 2016 Karin

Happy 2016!  One of many New Year's resolutions that I made this year was to start blogging regularly, so here goes! 
I am a bit of a Marilla Walker fan-girl at this point and here is a yummy coatigan I made using her Freemantle Coat pattern.  This is my second time making the pattern and so far I have not used it to make a wintery coat.  I think the shape is wonderful and lends itself to all sorts of interpretations.  For this incarnation, I used a thick wool-blend sweater knit in a very muted mauvey pink that I got in Portland while there visiting my sister last Spring.  For fabric shopping, it's good to have a sister who lives in Portland! 

I skipped the underarm gussets this time due to fabric limitation and luckily got away with it since the fit is so oversized and the fabric has a bit of stretch.  It's shortened by a few inches as well, also so I could squeeze the sweater out of my yardage.  You can see I love the pockets, they are wonderful with the shorter sleeves.  I also got a fancy bracelet from a good friend for my birthday and the sleeve length is perfect for showing that off too.

I mixed it up a bit construction-wise.  I just plain serged the seams, and without the gusset, main construction could not have been easier.  For the facings I went with some handdyed silk scraps, of which I always have many, and this neat-o silk bias tape also purchased in Portland at their legendary Pendleton store.  My visit just happened to coincide with one of their twice yearly sales!  Anyway, I got a whole roll of this bias tape.  I think it's a necktie material, marked as silk, and it just makes such a nice contrast to most of the girly, watercolory stuff I sew.  So once the silk got involved, everything got a bit more tricky and time consuming, but in a very satisfying way.  I hand-stitched the facings and pocket linings down, which was super simple to do invisibly since the sweater knit is so thick.  If I were to do it over, I would interface the back side of the welt opening.  The welt pockets in this combination of fabrics was pretty tricky and not my finest, but they are in and I did some hand-stitched bar tacks to reinforce where things got wonky.

I love how it looks from the back, so swingy!  I've worn this a ton.  It's super warm and snuggly but looks a bit posh too.  I know Marilla considered removing this pattern from her catalog since it can be a bit involved with all the lovely finishing ideas she included.  I'm so glad she reconsidered since it can really be made as simply or as complicated(ly) as desired. And someday, I do want to try the "real" version with all the fancy underlining and binding!

Well, that wasn't so bad.  I hope we'll be seeing a bit more of each other this year :)

3 Comments

Evan skirt

March 26, 2015 Karin
evan skirt front

I was privileged to have the opportunity to test Marilla Walker's newest pattern, the Evan skirt.  I love how it turned out! I didn't muslin, this is my first crack at using the test version of the pattern and this skirt is perfect.  That's some fine drafting for you!  Well, I did take 5/8" out of each side seam, but that's it!

The bored look on my face does not indicate my feelings about this skirt.  On the contrary!  I love it and plan to make more! I did the shorter version without the pocket details, but including the front slit.  I love the front slit.  It really ads something, without being at all revealing.  I wore this skirt to work and was very comfortable. 

evan skirt side

To play up the classic jeans detailing, I did a double line of topstitching around the fly, pockets and back yoke.  I wanted to have a more defined topstitch, but my machine was not cooperating with any of my topstitching tricks (double thread, triple stitch) and I had the perfect color of thread in a standard weight.  So I just went with it.

evan skirt back

I left off the back pockets and the belt loops.  I never wear a belt if I don't have to, and I felt like this fabric was busy enough without pockets in the mix. 

So fabric.  I handdyed this fabric using fiber reactive dyes just for the occasion!  I have no idea where I got this fabric, I have a partial bolt of it and the label reads "white weavers cloth" 55 poly 45 cotton.  I had planned to use this fabric not realizing the poly content, once I realized I wondered if it would dye at all.  So I was super pleased with how it turned out.  The cotton fibers dyed beautifully and the poly fibers stayed white giving it a faded/aged look or like it was woven with a white weft.  You can see this a little in the picture below on the darker spots.

evan skirt

I had no problem with the instructions for the skirt and they've been improved since.  Fly front was a piece of cake.  I've only ever used the Kenneth King Jean-ius method before and to be honest, I can't remember it, I just watch the video again every time I need to use it.  My mama brain does not retain that kind of non-essential information any more :)  So not sure how this differs, but I can say it's easy to use and produces a lovely result.

I used a cotton fabric that I block printed about a million years ago to face the waistband (didn't fancy the poly rubbing on my skin).  I just happened to have the perfect length vintage metal aqua zipper in my stash and the button was stash too.  Do you know what that means?  This skirt was free!  I already owned everything to make it and I got the pattern in exchange for my testing notes.  So I feel like a thrifty goddess and ready to buy a bunch of Liberty or silk charmeuse.

This style of skirt is a wardrobe staple.  I may take a little of the flare out on future versions for more of a straight fit.  I might even make it in denim.  It's a good one, Marilla, thanks for letting me join in!

2 Comments

Waxed canvas Minoru jacket

January 20, 2015 Karin
Minoru jacket: raincoat in the sun.

Minoru jacket: raincoat in the sun.

My new raincoat made with the Sewaholic Minoru pattern in waxed canvas.  Pretty crazy to use such a stiff fabric for this pattern, but I got it done and it did turn out pretty neat.  Hopefully I'll stay dry if it ever rains again. 

hood from all angles

hood from all angles

The sad part is that I don't love it.  Maybe it'll grow on me, but right now it feels like a letdown.  The main problem is the fit.  I did muslin and went up two sizes, plus did a broad back adjustment, and sewed the entire underarm seam at a scant 3/8th seam allowance, but it's still tight through the back and shoulders.  I can't comfortably wear a big sweater underneath.  Boo!  Lesson learned: always do a second muslin for a big project, especially if you're ignoring the recommended fabrics.  Unfortunately, I think that my body type may just not mesh well with the Sewaholic fit model.

minoru jacket lining

minoru jacket lining

Here's the lining which I do really like.  I love the buffalo plaid flannel and I used a sample piece of silk charmeuse that I overdyed with indigo for the sleeve linings which you can see a teensy bit here.  Instead of fusible interfacing which didn't make sense for this fabric, I used a piece of an old sheet that I've kept for making muslins.  It has a high threadcount, tightly woven.  Worked great as a sew-in interfacing for the placket and collar lining, and interlining for the sleeves.  Machine basting the silk to the cotton sheet also made it super quick and easy to sew later.

Modifications: lined hood, left off cuffs and did a facing hem on the sleeves, single welt pockets done using Poppykettle's excellent tutorial.

Materials: Waxed canvas from A.L. Frances Designs.  They were so wonderful to work with and did a custom product for me with a lighter weight 7 oz. canvas.  I really like this stuff because it is waxed with beeswax instead of a petroleum based wax like most waxed canvas.  So cool!   

For next time:  eh, I don't know.  I guess I could go up another size in the shoulders, but I think I may just have to let this one go and accept that this will not be a multiple make pattern for me.

I had to include this one for the star on my glasses.

I had to include this one for the star on my glasses.

Thank you, Sammy, for taking these pictures for me two days before you gave birth.  You made me look great!

3 Comments

Dying with Indigo

November 13, 2014 Karin
shibori silk dress

shibori silk dress

Turns out most things are better blue.  I got an indigo kit and promptly fell down a rabbit hole of blue.  So many things ended up in the dye pot, from brand new tea towels destined for christmas presents, to stained hand-me-downs, to underwear?  Yes, anything you can think of ended up blue.  So much fun!

tea towels!  the kids helped to tie these and supervised the dipping

tea towels!  the kids helped to tie these and supervised the dipping

I got super into the freedom of not having to pretreat in any way, besides getting them wet, and I forgot about that with the second batch anyway.  Plus you can dye cotton, silk, and wool with a single method.  No switching mordants, no heat.  Piece of cake.

The kids helped me tie these towels and were really into helping.  The problem is that we do not have rubber gloves that fit their small hands, so they couldn't help with the dunking.  But since I did it outside, they just went to play and came back to check periodically.  I really enjoyed talking to the almost-6-year-old about oxidation and how it turns from green to blue, he really got that.

new undies and overdyed silk remnants.  Love how this silk turned pale blue.  It was already dyed pink, but it was too pink, if you know what I mean.  Now, I'm in love.

new undies and overdyed silk remnants.  Love how this silk turned pale blue.  It was already dyed pink, but it was too pink, if you know what I mean.  Now, I'm in love.

Kiddo needed new underwear.  I got these undies at target and now they are so cool!  I can't make all of the things and underwear is not something I'm comfortable thrifting.  Now we have interesting underwear without superheroes.  Check out how they just run the serger thread off the side of the underwear and leave it hanging out there. Nice, ready to wear.

Excessively studly gentleman with shibori dyed tee shirt!  Facial expression does not indicate level of satisfaction, much.

Excessively studly gentleman with shibori dyed tee shirt!  Facial expression does not indicate level of satisfaction, much.

I'm just so tickled with how everything turned out.  My husband was tossing a few undershirts that had gotten pretty dingy.  I rescued them for exactly this type of thing.  Now I can torture him with hand dyed garments for free!  Does he like it:  "yeah . . . it's not really my style though."  Maybe a grey overdye to tone it down a bit?  I have another shibori experiment in mind to win him over.

more shibori, including a flannel receiving blanket in the middle.

more shibori, including a flannel receiving blanket in the middle.

There were a couple of casualties.  The prints that I overdyed did not turn out.  I thought I would have the same lovely print, but with a blue cast to it.  Nope, the print turned all muddy and hard to make out.  Lesson learned.  Items that were a solid base color or a more organic dye pattern turned out great, so stick with those.

One of my favorites is the dress in the first picture.  It's a shibori method that I'm sure I didn't invent, but I did devise myself based on the method where you wrap the fabric around a pole and tie.  I accordion folded first to get the chevron/herringbone effect and I really like how that turned out.  That one will be for sale once I get the shop going.  I'll definitely be experimenting with that shibori style more too.  This was my first foray into the wonderful world of indigo, but a few more are already planned.

2 Comments

This'n that

October 22, 2014 Karin
team dyed ottoman cover

team dyed ottoman cover

I get that this is pretty blurry, our living room doesn't have the greatest light.  I've been tooting around doing a few little side projects while I chip away at my Dream work.  I'm a multitasker.  The cover I had sewn for our Ikea ottoman around the time I was also making that big boy up there, finally got a small hole.  Then a rip, then another rip.  At last, it was unavoidable, a replacement was needed.  To make this cover free, I used some cotton duck fabric I had leftover and James helped me to dye it.  He is rather brilliant, I think! 

heather ross unicorn pants

heather ross unicorn pants

Unicorn pants for the little one's third birthday!  Made using my 2T pattern lengthened for a growing stringbean.  These are lined in some flannel that I dyed ages ago.  So they are reversible and cozy.  He will not wear them.  Hopefully that will change when the weather finally gets colder.  I have this awesome Heather Ross unicorn fabric in the blue colorway for James and the pink for me.  Unicorns for everyone! (except Papa)

visible mending

visible mending

I've been having some fun with visible mending while taking Katrina Rodabaugh's slow fashion class. 

1 Comment

Dream prototypes

October 8, 2014 Karin
more testing

more testing

As requested by my sweet Julie, here are some pictures of what's going on with the Dream line.  This one is a little snug, the result of an experiment with sewing the garment before washing and then dying.  I was pretty sure I knew what would happen, but what if it didn't?  The dying turned out especially beautiful on this one.  Hello! There is a rainbow right across the bust!

I've been working hard to slow down and experiment with this little project.  I was described by a college professor as "temperamentally concise" and I describe myself as "a good enougher."  So I've been fighting my nature and commanding myself to take my time and try things that might fail.  See what will happen and figure out the best way to do each step.  That way I can get to a product that I'm really proud of.

early test piece - not ironed!

early test piece - not ironed!

Here's an earlier test piece.  I misjudged the amount of fabric that I died so this one is short.  Here I tried both french and flat felled side seams and I tested out an exposed edge treatment on one of the armholes.  The results on both the flat felled and exposed edge are definitely No, but I'm still glad I tried.  I've been wearing this one around quite a bit with leggings in the cool mornings and then bare legs in the afternoons.  Since this version I brought the neckline up a little bit.  In this super drapey fabric a low neckline can be a liability.

3 Comments

Liv, kind of

September 16, 2014 Karin
Liv hack

Liv hack

I almost wondered if this yarn was cursed.  This is the third pattern I tried to knit with it and even the second try at this particular pattern.  This is the Liv Sweater by Carrie Bostick Hoge, kind of.  I left off the center front increases at the point where I stopped the raglan increases.  I lost the basic swingy nature, but in this thick cotton, it was just too much bulk.  I do highly recommend the Blue Sky Cotton Worsted, so soft and a little pearly.

hem shaping courtesy of short rows

hem shaping courtesy of short rows

Here you can see that I kept the short row shaping.  The Sunday short row method is really very nice, I hadn't done that before.  Elbow length sleeves are courtesy of not enough yarn.  I actually weighed the last ball.

color pooling

color pooling

Here you can clearly see the color pooling.  I know you're supposed to knit from alternating balls, but to me that's no fun.  I'd rather enjoy the knitting and deal with the pooling.  Did I mention I overdyed this yarn.  Seems like everything gets dyed these days.  The original color was pretty and flattering to my coloring.  It also felt flat and boring and a little twee if I'm honest.  This turquoise is a little outside what I generally go for these days, but it's just so beautiful to look at.  I love carrying this one around and just admiring the colors.

2 Comments

Slippers K2 - Collaboration

August 26, 2014 Karin
Collaboration

Collaboration

Honestly, I'm not exactly sure what happened here.  I started out with this image of denim slippers  found via some pinterest links on mending posted in this amazing blog post on the Craft Sessions.  Now that I look back at the picture, they look a little different than I remembered.  But anyway, James needed new slippers for his second year of kindergarten.  So I decided that I would make James a pair of slippers with these in mind,and of course influenced by all of the hand stitching that internet rabbit hole had exposed me to.  So here we are. 

From the back.

From the back.

James picked the yellow floral and the gold (of course!) stitching on the front.  I picked the denim and the red stitching.  My feelings about the results are sort of tepid.  Does that ever happen to you?  You're all gung ho about a project, all inspired and fired up, and get to the end and wonder what happened?  But I'm very proud that I drafted the pattern for these myself, in just a few minutes, with his help, and they fit!

Self drafted on a discarded drawing.

Self drafted on a discarded drawing.

There was a time constraint involved.  Perhaps there was a moment when I could've reevaluated, but didn't in the rush to get them done?  But today James has a pair of slippers to wear in kindergarten that his mama made for him, a cuddly reminder of my love as he goes out on his own.  So that's something.

Details:  quilting cotton lining, lightweight denim outer, suede sole stitched inside denim (from a thrifted suede jacket), uppers are interlined with a layer of flannel and then a piece of cotton batting tucked in, sole is interlined with a thick sturdy piece of felted wool sweater.

Next time: make the entire sole suede and put a little suede bumper on the toe like I've seen in some rtw slippers

1 Comment

bloglovin

August 20, 2014 Karin

Bloglovin

done

2 Comments

Testing, testing

August 19, 2014 Karin
research!

research!

Enjoying so much the exciting beginnings.  Trying out silks and dye methods.  The silk satin has the most delicious fluttery drape, slithers and feels like nothing on, but is still basically opaque:  dream fabric.  Couldn't do it without my special helpers!

2 Comments

About

Hi, I'm Karin. I'm glad you're here.


Subscribe

Sign up with your email address to receive news and updates.

I will not share your information, and will keep updates limited to the good stuff.  Promise.

Thank you!
Gallery Block
This is an example. To display your Instagram posts, double-click here to add an account or select an existing connected account. Learn more
Porta
Etiam Ultricies
Vulputate Commodo Ligula
Elit Condimentum
Aenean eu leo Quam
Cursus Amet
Pellentesque Risus Ridiculus
Porta
Etiam Ultricies
Vulputate Commodo Ligula
Elit Condimentum
Aenean eu leo Quam
Porta Etiam Ultricies Vulputate Commodo Ligula Elit Condimentum Aenean eu leo Quam Cursus Amet Pellentesque Risus Ridiculus Porta Etiam Ultricies Vulputate Commodo Ligula Elit Condimentum Aenean eu leo Quam
You must select a collection to display.

Powered by Squarespace